    Video camera control board
This is a set for manual assembly of a video camera controller. The controller was initially created for Sony NEX cameras, but can be used for other cameras as well.
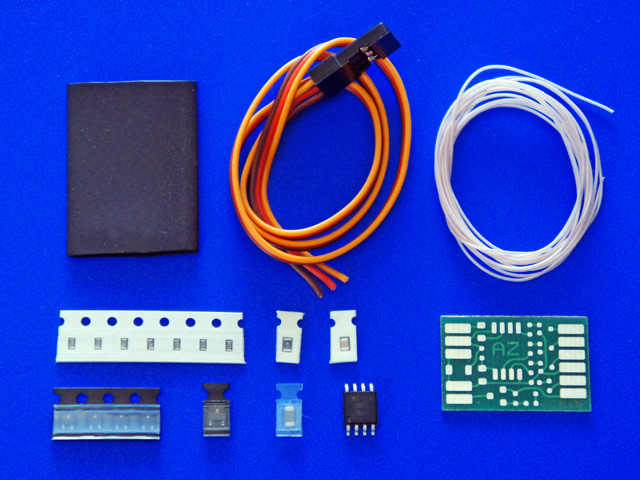
Controller functions: 1) Enable/disable recording 2) Activate autofocus 3) Shutter control 4) OSD output for displaying the current battery voltage and mode. A demonstration of the controller working with a Sony NEX-5 camera: The controller uses one control channel with a 3-position switch to control the camera. The neutral position of the switch gives no action, the top position starts/stops recording and the lower position is used for taking photos (PWM 1.0-1.3 ms / 1.3-1.7 ms / 1.7-2.0ms). In order to connect a camera, you first need to disassemble it. If you find the process of assembling the controller too complex, you should not proceed to camera disassembly. Assemble the controller as shown in the illustration below.
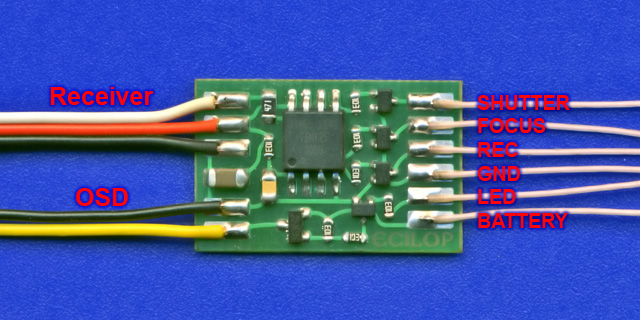
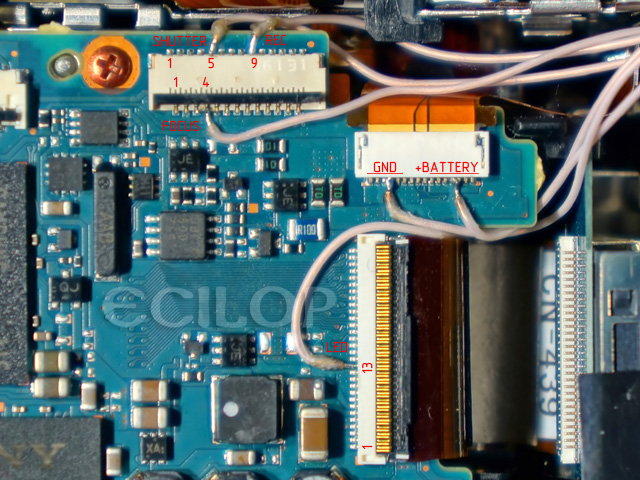
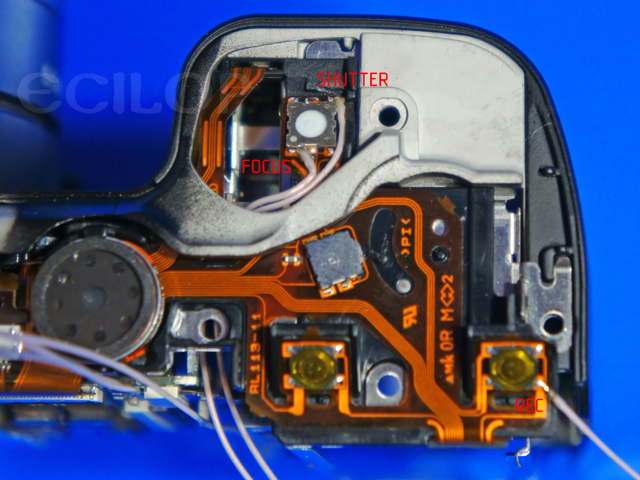
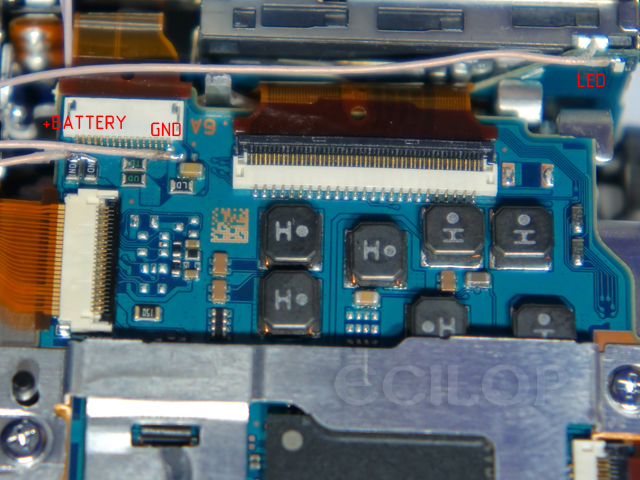
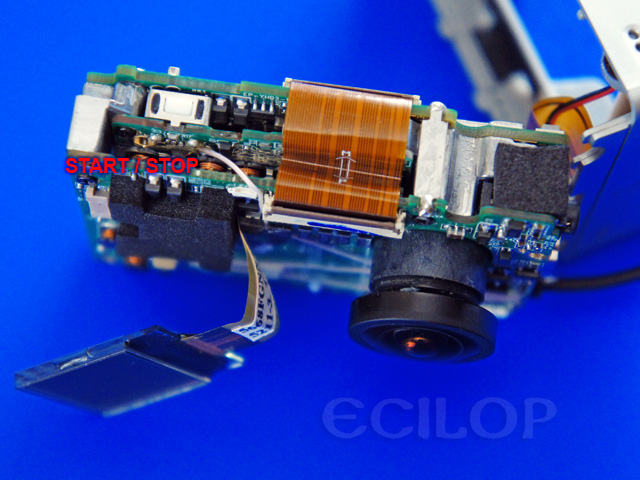
Elements that look identical are in fact identical. Start the assembly with small elements, then proceed to larger ones (a total of 16 elements). The last thing you need to do is to solder the wires according to the manual. Connect the OSD wire to the voltage input of the "second battery" on the OSD module (do not use this signal for powering the OSD module!). When the camera is enabled, its battery voltage will be displayed. If the displayed voltage periodically goes away, it means that the camera is busy. The illustrations show the contacts in Sony NEX-5 and NEX-5N cameras to be used for connecting controller wires. NEX-5:
NEX-5N:
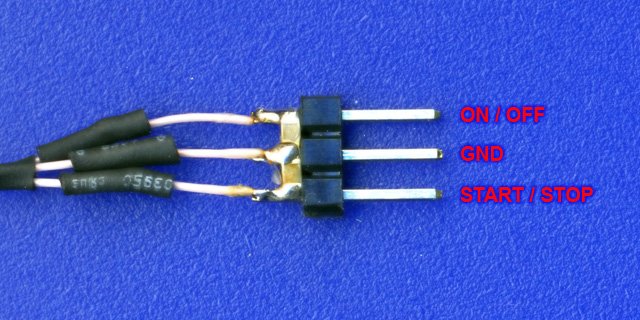
The controller can be used in combination with any other cameras if their control buttons connect the contact to GND (ground). The illustrations below demonstrate the controller assembly process and its connection to a GoPro camera.
If you are using a GoPro camera, you also need to get rid of wire noise by adding two 10nF capacitors between GND and the contacts being sealed in. In the package, these capacitors are covered with an orange sticker.
|